Slardar
*  Fire Spirits greatly reduces Slardar's already low starting attack speed (which Bash of the Deep relies on), making the laning phase very hard for him and discouraging Slardar from aggressively threatening lane kills.
*  Supernova, ignoring Phoenix's lack of armor and Slardar's high damage single hits, is extremely hard for Slardar to take down on his own, especially after being hit by Fire Spirits.
*  Icarus Dive is one of the longest distance escape spells in the game, and can help a good Phoenix escape from Slardar before he gets a
  Blink Dagger. However, the high cooldown means Phoenix is vulnerable to backstabs from any roamers after said spell is used.
* Slardar can interrupt an Icarus Dive from completing the flight with both of his stuns, however, likely leading to death if Supernova is on cooldown.
* A lot of the items a Phoenix builds throughout the game naturally counter Slardar.  Shiva's Guard,
  Heaven's Halberd and
  Eul's Scepter of Divinity all stall Slardar's normal attacks in some way, while
  Spirit Vessel's percentage-based damage is good against his innate durability.
Witch Doctor
* Heroes with slow movement speeds and small health pools (supports like  Crystal Maiden or
  Witch Doctor) are easy targets for Phoenix. Should they be inflicted by its DOT debuffs, they will be very quickly killed without even getting a chance to fight back.
Slardar
*  Tidehunter's
  Kraken Shell dispels Corrosive Haze and Bash of the Deep's stun if enough damage is taken.
  Anchor Smash and Kraken Shell's damage block also reduces Slardar's damage.
Witch Doctor
* Kraken Shell dispels the stun from Paralyzing Cask. However, it does not dispel the damage from Maledict.
* Once Witch Doctor first uses his Death Ward in team fights, Tidehunter can simply cancel it with  Ravage, turning the tables against him, especially if Witch Doctor does not have a
  Black King Bar.
* As a precaution, Witch Doctor should let Tidehunter use Ravage first before channeling Death Ward to turn a team fight in his favor.
Slardar
* Illusion heroes like the aforementioned  Phantom Lancer or
  Naga Siren, or heroes that tend to buy
  Manta Style, like
  Luna or
  Juggernaut, will give Slardar a hard time, as his damage is single-targeted.
Witch Doctor
* Luna can easily cancel channeling spells with  Lucent Beam and 0.25s Eclipse Lucent Ministun talent for
  Eclipse, she can also buy
  Abyssal Blade in case they decide to buy Black King Bar:
  Enigma's
  Black Hole, Witch Doctor's
  Death Ward,
  Shadow Shaman's
  Shackles,
  Lion's
  Mana Drain,
  Bane's
  Fiend's Grip,
  Pudge's
  Dismember, Crystal Maiden's
  Freezing Field,
  Pugna's
  Life Drain,
  Dawnbreaker's
  Solar Guardian, and Naga Siren's
  Reel In from
  Aghanim's Scepter.
Additional:
* Lucent Beam interrupts Death Ward from a decent range.
* With Dust of Appearance, Eclipse kills Witch Doctor during Death Ward, even through  Glimmer Cape.
Witch Doctor
* Vengeful Spirit has two abilities to interrupt Death Ward, even through Black King Bar.
Witch Doctor
* Wraithfire Blast cancels Death Ward in decent range.
* Death Ward is meaningless while Reincarnation is off cooldown.
* Vampiric Aura can out-heal the {tooltip:DoT|Damage over Time} from  Maledict.
Witch Doctor
* Like any hero with a channeled spell,  Last Word is a counter to it.
*  Global Silence goes through spell immunity and prevents Witch Doctor from casting his spells.
Slardar
* Abaddon can cast  Aphotic Shield on any of his allies to immediately dispel Corrosive Haze and/or the stun and the slow components of Slithereen Crush.
* All of Slardar's debuffs are also removed if Abaddon's  Borrowed Time triggers.
Witch Doctor
*  Guardian Angel protects allies from Death Ward's physical damage.
*  Purification and
  Heavenly Grace will most likely save teammates from dying to Maledict.
Witch Doctor
* Beware of placing the Death Ward if  Chronosphere is off cooldown, as it will cancel the effect and leave Witch Doctor vulnerable if he does not react in time.
Slardar
* Slardar has high priority on building moblity items such as Blink Dagger rather than tank items. Zeus can easily deal large amount of damage to him if not caught out of position first.
Slardar
* Phantom Lancer's  Doppelganger has a low cooldown and applies a basic dispel on PL, making it hard to keep Corrosive Haze on him.
* Phantom Lancer usually purchases Manta Style which provides another basic dispel to remove Corrosive Haze with.
* Besides Slithereen Crush, Slardar does not have another way to deal with illusions and has a low mana pool, which allows Phantom Lancer with  Diffusal Blade to quickly build up illusions while draining Slardar's mana.
*  Phantom Rush outruns Guardian Sprint, forcing Slardar to Blink away or use Slithereen Crush defensively to avoid being killed.
Slardar
*  Terrorblade starts out with and gains a lot of armor from his agility growth. His illusions also make it difficult for Slardar to focus down the real Terrorblade.
Witch Doctor
* Witch Doctor's Maledict burst damage can be prevented by Sunder if timed correctly. But it can kill Terrorblade if he has no target to be Sundered with, especially in the early game.
* Death Ward deals physical damage, and Terrorblade's high armor can help him survive against Death Ward. However, Terrorblade has no disable in his skillset at all, and he cannot stop Witch Doctor from channeling Death Ward to maximum. And if Witch Doctor owns Aghanim's Scepter, attacks from Death Ward will be able to bounce around and wipe out Terrorblade's illusions and his team.
* Terrorblade must be careful as  Paralyzing Cask is commonly tricky to dodge for him due to his reliance on illusions.
Witch Doctor
* Heroes who have channeling abilities because Terrorblade has no disables to cancel them at all besides  Terror Wave from Aghanim's Scepter, and he does not like buying disabling items at all: Enigma's Black Hole, Witch Doctor's Death Ward, Shadow Shaman's Shackles, Lion's Mana Drain, Bane's Fiend's Grip, Pudge's Dismember, Crystal Maiden's Freezing Field, Pugna's Life Drain, Dawnbreaker's Solar Guardian, and Naga Siren's Reel In from Aghanim's Scepter.
Witch Doctor
* Witch Doctor's iconic Death Ward is a perfect spell for Rubick to output high damage.
* Death Ward requires channeling which makes Witch Doctor a clear tagret for stealing. Rubick can steal the spell outside of Death Ward's attack range most of the times.
* Note that an skilled Witch Doctor player can cast  Voodoo Restoration to disrupt their last spell for Rubick to steal.
*  Telekinesis can interrupt a channeling Death Ward. With Death Ward's high burst damage, combining Death Ward and Telekinesis to hold enemy in place can result in a solo kill in the early game.
* Paralyzing Cask provides an additional disable. The ability also helps moderately with farming.
* Voodoo Restoration provides some utility by healing Rubick and his team.
* Maledict is a damage-over-time nuke that amplifies the damage enemy taken.
* Telekinesis can reposition the enemy within the range of Maledict.
Additional:
* Rubick can steal Death Ward easily as it is a channeled ability and then use it to turn teamfight to his advantage.
* However, a skilled Witch Doctor will toggle Voodoo Restoration immediately after placing his Death Ward to prevent that.
Witch Doctor
* Death Ward can be easily canceled by Jakiro, or even turned against him with Macropyre, due to it's attack range being smaller then Jakiro's cast range. And Crystal Maiden, his Scepter does not allow him to move while using it.  Voodoo Switcheroo is even easier to land Jakiro's Macropyro/Ice Path combo. And unlike Crystal Maiden, Witch Doctor's Aghanim's Scepter upgraded Death Ward does not allow him to move while using it.
* While Maledict can be quite effective on Jakiro, along with repetitive stuns from Paralyzing Cask, it is very difficult to get a strong Maledict on him. Although Witch Doctor's Paralizying Cask, Maledict and Death Ward combo will still quickly eliminate Jakiro.
* On the other hand. Voodoo Restoration will partly protect his allies from Jakiro spells, as it heals based on their Max Health once he gets his Talent (Level 25). Before then though, it won't make a dent in the damage Jakiro deals.
Witch Doctor
* Morphling can  Attribute Shift to strength after being hit by Maledict. Since Maledict deals its damage based on the difference between HP on cast and HP after two seconds, odds are Morphling will have more HP than when Maledict was cast, thus resulting in no damage.
* On the upside, players prone to panicked reactions may Morph to agility, making Maledict even more efficient than intended.
*  Adaptive Strike (Strength) can interrupt Death Ward at a decent range.
Witch Doctor
* Heroes with plenty of summons, such as  Broodmother or
  Nature's Prophet can have their minions soak up most of your Paralyzing Cask.
Witch Doctor
* Generally, any fragile heroes will have a hard time dealing with Undying's tankiness, and even more so if Decay is used on them. Some examples are Crystal Maiden and Witch Doctor.
Slardar
* Illusion heroes like the aforementioned Phantom Lancer or Naga Siren, or heroes that tend to buy Manta Style, like Luna or Juggernaut, will give Slardar a hard time, as his damage is single-targeted.
Witch Doctor
*  Arc Warden's
  Magnetic Field dodges all damage from Death Ward.
Witch Doctor
* Low health spellcasters:  Lina, Witch Doctor,
  Tinker,
  Keeper of the Light, all rely heavily on their spells and are fragile heroes. They all also have avoidable spells, allowing Puck to get to them and quickly burst them down.
Witch Doctor
* Heroes that depend on disrupting fights with ability combos or big ultimate abilities are vulnerable to the long stun of Fiend's Grip:  Disruptor,
  Death Prophet, Enigma,
  Faceless Void,
  Invoker,
  Lich,
Lich,  Magnus,
  Mars,
Mars,  Medusa,
  Outworld Destroyer,
  Phoenix,
  Puck,
Puck,  Queen of Pain,
  Shadow Fiend,
  Treant Protector,
  Underlord,
  Winter Wyvern, Witch Doctor,
  Zeus.
Zeus.
Slardar
* Enigma can be a perfect counter-initiator with his ultimate. A perfectly timed Black Hole will turn the tide of any initiation, especially from heroes like;  Spirit Breaker,
  Legion Commander,
  Axe, Puck, and
  Slardar.
Witch Doctor
* Heroes that have small health pools and little to no escape mechanisms are even easier prey for Necrophos. Ghost Shroud's slow will allow him to catch him with them, and get nuked down with his abilities, even preventing retaliation due to Reaper's Scythe's stun. Such heroes include Crystal Maiden, Witch Doctor,  Warlock or Shadow Fiend.
Witch Doctor
* Heroes with channeled abilities can be interrupted by a long-range Fissure: Crystal Maiden, Witch Doctor, Bane, Pugna, Pudge.
Witch Doctor
* Heroes like  Slark, Witch Doctor and others also tend to suffer in Ice Blast's heal denial.
Witch Doctor
* Channeling heroes will not go well against Warlock, especially those who build Black King Bar as Warlock's ultimate ability stun goes through spell immunity. E.g.: Crystal Maiden, Witch Doctor, Enigma, etc.
Witch Doctor
* Heroes with long channeling abilities like Witch Doctor are easy targets for Kunkka to interrupt in team fights.
Additional:
*  Torrent can cancel Death Ward from a far distance.
Witch Doctor
* Heroes with powerful channeling abilities are easily interrupted by Phantom's Embrace: Bane, Pudge, Witch Doctor, Crystal Maiden, Enigma.
Witch Doctor
* Heroes who rely on channeling abilities can be interrupted in teamfights by Rolling Thunder: Crystal Maiden, Pugna, Witch Doctor
Witch Doctor
* Heroes who have channeled abilities can be stunned by Light Strike Array, like Witch Doctor with Death Ward and Bane's Fiend's Grip.
Additional:
*  Light Strike Array cancels out Death Ward from a long distance.
Witch Doctor
* Heroes with the ability to heal allies will not be able to heal heroes affected by  Doom:
Doom:  Chen,
Chen,  Dazzle,
  Io,
Io,  Oracle,
  Omniknight, Witch Doctor, Winter Wyvern,
  Abaddon, etc.
Witch Doctor
* Fragile support heroes are all ideal targets for the Phantom Assassin. Heroes such as Lina and Witch Doctor are all prime targets that may not be able to react quickly and fight back due to Phantom Assassin's sudden appearance.
Slardar
* Slardar does not do well against multiple targets, as his only way to damage multiple targets is Slithereen Crush.
* Meepo's  Earthbind will root Slardar, making him unable to chase/escape for the time being. Also,
  Poof's low cooldown and high damage can burst Slardar down rather quickly.
Slardar
* Heroes who can stun multiple units at once:  Dark Willow, Spirit Breaker, Slardar, Invoker, and Tidehunter.
Witch Doctor
* Sacred Arrow can be used to interrupt Death Ward from a safe distance, forcing him to cancel it to dodge or get hit.
* Paralyzing Cask is a slow-moving stun, and Mirana can Leap away from her allies to keep it from bouncing.
* Witch Doctor has low health and can easily be killed with an Aghanim's Scepter combo or just when hit with an arrow.
Slardar
* Heroes with spells that negate invisibility such as  Bounty Hunter, Zeus and Slardar prevent her from saving her allies with Moonlight Shadow.
Witch Doctor
* Death Ward does little damage against Dragon Knight's armor, and Dragon Knight's high health regeneration minimizes damage from Maledict.
Slardar
* Slardar can chase Dragon Knight down with  Guardian Sprint and stun him with both
  Slithereen Crush and his passive
  Bash of the Deep. He can also use
  Corrosive Haze to whittle Dragon Knight's armor.
Slardar
* With armor items like  Solar Crest or
  Assault Cuirass combined with Bash of the Deep, Slardar can easily tank the
  Duel, If not dueled himself, he can drop Legion Commander's armor during duel and/or buff his teammate and save them, leaving her only the choice of dueling supports which can also be saved with fast Blink into Slithereen Crush.
Witch Doctor
* Paralyzing Cask can save ally from Legion Commander Duel's until she purchases Aghanim's Scepter.
* Voodoo Restoration can heal Witch Doctor allies from Duel's.
* Death Ward can help Witch Doctor allies from winning Duel's, if, he is not a target.
Slardar
* Corrosive Haze hinders Nyx Assassin's ganking attempts with  Vendetta, as well as reducing his armor and make him very vulnerable due to his low health pool.
* Guardian Sprint allows Slardar to catch up with Nyx Asssassin and finish him off if he has vision over him.
Witch Doctor
* Heroes who build Black King Bar as either core or situational item will be able to fight back against Nyx Assassin and freely attack him as Spiked Carapace cannot pierce spell immunity at all: Axe, Broodmother, Dawnbreaker, Enigma,  Huskar,
  Jakiro, Legion Commander, Lina, Luna,
  Lycan, Slardar, Slark,
  Troll Warlord, Witch Doctor.
Slardar
* Slardar deals entirely physical damage. He does not have to worry about Counterspell.
* Slithereen Crush and Bash of the Deep prevent Anti-Mage from using Blink, the latter even if Anti-Mage activates Black King Bar.
* Corrosive Haze allows allies to take down Anti-Mage before he has a chance to Blink, and maintains vision over him even if he does Blink away.
Additional:
* Slithereen Crush and Bash of the Deep deals physical damage, bypassing the magic resistance bonus from  Counterspell
* Corrosize Haze significantly increases the damage dealt against Anti-Mage, and makes it harder for him to flee with  Blink, although Anti-mage can block its casting with with Counterspell
Witch Doctor
* Heroes with abilities or items that can silence or disable Anti-Mage for long periods of time will prevent him from Blinking away: Lion,  Silencer, Shadow Shaman,
  Grimstroke, Witch Doctor,
  Riki, Faceless Void,
  Skywrath Mage, Puck.
Slardar
* Slardar can attack through Plague Wards and gain Bash of the Deep charges, and  Templar Assassin can spill
  Psi Blades through Plague Wards too.
Witch Doctor
* Voodoo Restoration heals to counter damage over time of  Poison Nova and
  Poison Sting.
Slardar
* Guardian Sprint allows Slardar to outrun Bristleback, even when slowed by Viscous Nasal Goo.
* Corrosive Haze's armor reduction makes Bristleback much less tanky.
Witch Doctor
* Maledict cannot be dispelled by Phantasm, and can be used to tag the real Chaos Knight hiding within his illusions.
* If Witch Doctor has an Aghanim's Scepter, Death Ward will bounce between Chaos Knight's illusions, destroying them quickly.
* However, Death Ward is easily interrupted by Chaos Bolt until Witch Doctor buys Glimmer Cape or Black King Bar.
Witch Doctor
* Paralyzing Cask will repetively bounce between Chen and his converted creeps every single time. This can get even worse if Witch Doctor buys Aghanim's Scepter that will allow his Death Ward to bounce between Chen and his converted creeps.
* Paralyzing Cask, Maledict and Death Ward combination will often kill Chen's allies before he can save them with  Hand of God. And to make things worse, Chen has no way to cancel Death Ward on his own, and must rely on outside from {U:Centaur Conqueror} or {U:Mud Golem} under his control.
* Voodoo Switcheroo from  Aghanim's Shard cannot be interrupted by Chen's creeps at all because Witch Doctor is hidden for it's duration.
Additional:
* Paralyzing Cask will repetively bounce between Chen and his converted creeps every single time. This can get even better if Witch Doctor buys Aghanim's Scepter that will allow his Death Ward to bounce between Chen and his converted creeps.
* Paralyzing Cask, Maledict and Death Ward combination will often kill Chen's allies before he can save them with Hand of God. And to make things better, Chen has no way to cancel Fiend's Grip on his own, and must rely on outside from {U:Centaur Conqueror} or {U:Mud Golem} under his control.
* Voodoo Switcheroo from Aghanim's Shard cannot be interrupted by Chen's creeps at all because Witch Doctor is hidden for it's duration.
Witch Doctor
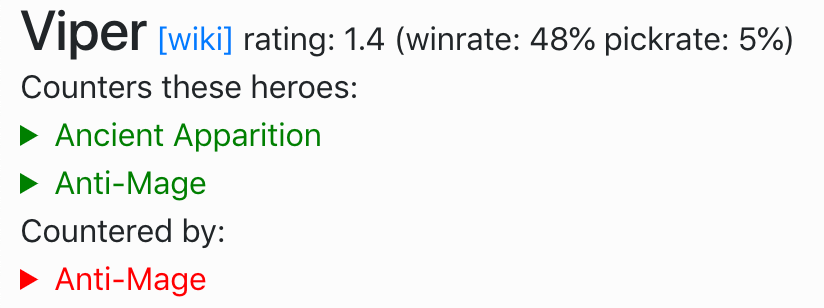
* Voodoo Restoration heals to counter damage over time of Viper abilities.
* Viper has no way to cancel Death Ward, even through  Rod of Atos.
Slardar
* Weaver relies on  Shukuchi to escape and kite enemy heroes. Slardar's Corrosive Haze lowers armor and reveals Weaver, who is already a very frail target.
* Weaver usually builds  Linken's Sphere, Corrosive Haze can be used to pop the spell block, additionally the level 25 undispellable talent will prevent Weaver from removing Corrosive Haze with
  Time Lapse, allowing allied heroes to use their abilities on Weaver.
Additional:
* Corrosive Haze lowers armor and reveals Weaver during Shukuchi, who is already a frail target. In addition, Weaver usually builds Linken's Sphere, and Corrosive Haze can be used to "pop" the spell block. His level 25 talent can also make Corrosive Haze undispellable by Time Lapse, which puts Weaver in an even worse situation.
* Guardian Sprint can dodge Weaver's bugs with the movement speed bonus.
Slardar
* Corrosive Haze will reveal Treant Protector even when he is under the effects of Nature's Guise.
Witch Doctor
* Death Ward with Aghanim's Scepter makes quick work of the spawned illusions from Disruption.
* However, it can be cancelled by Disruption until Witch Doctor buys Linken's Sphere or Black King Bar.
* All of Witch Doctor's abilities are active, making Demonic Purge break from Aghanim's Scepter useless.
* Voodoo Restoration can out-heal the damage from Shadow Demon's abilities.
* An attempt to save an ally using Disruption can easily become a perfect setup for a Maledict or Paralyzing Cask for the enemy.
Slardar
* Shadow Fiend, a normal  Shadow Blade builder often relies on its invisibility to escape fights. Corrosive Haze reveals Shadow Fiend and also weakens his already low armor.
Slardar
* Corrosive Haze followed by Slithereen Crush takes advantage of Alchemist's main weakness, being physical damage before he has the change to improve his surviability with items.
* Bash of the Deep will deal lots of damage during the laning phase.
Witch Doctor
* Paralyzing cask bounces between him and his wolves, keeping him stunned for long amounts of time.
Slardar
* The brutal physical damage of Slithereen Crush and Bash of the Deep can quickly remove Void Spirit's shield and stun him for a while.
* Corrosive Haze provides vision of Void Spirit while he is running away and Guardian Sprint allows Slardar to quickly close the gap
Witch Doctor
* Paralyzing Cask is likely to bounce between him and his bear every single time.
* Lone Druid's lack of mobility makes him vulnerable to Death Ward and Maledict.
Slardar
* Corrosive Haze and Bash of the Deep will make short work of Huskar's low armor, even if Slardar is alone.
Slardar
* Slardar can reveal Clinkz with Corrosive Haze and make him easy to kill, and his Bash of the Deep also hits hard against Clinkz's naturally low health pool.
* Slardar's Guardian Sprint can catch up with Clinkz's Skeleton Walk.
* The stun and slow from Slardar's Slithereen Crush can hold Clinkz in place.
Additional:
* Clinkz survivability depends entirely on  Skeleton Walk. Corrosive Haze not only makes its invisibility useless, but also makes Clinkz even more vulnerable to physical damage.
Slardar
* Slardar is one of the few meele heroes who can lane against Ursa in the early game, out harassing him with Bash of the Deep, and running away from a bad engagement with Guardian Sprint
* Corrosize Haze can force Ursa to cast  Enrage defensively instead of offensively
* With Corrosize Haze, Slardar's team can quickly dispatch of Roshan, denying one of Ursa's greatest advantages
Witch Doctor
* Heroes with magical or pure damage output will not have any problems against Atrophy Aura at all: Luna, Lina, Jakiro, Pugna, Bane,  Snapfire,
  Muerta,
  Nyx Assassin, Enigma, Tinker, Witch Doctor, Zeus, Crystal Maiden.
Slardar
* Slardar's level 25 talent makes Corrosive Haze undispellable, thus providing his allies vision of Slark.
Slardar
* Crystal Maiden's already low armor and easily interruptible ultimate, Freezing Field can make Slardar her worst nightmare. Crystal Maiden also often builds Glimmer Cape which is revealed by Corrosive Haze.
Slardar
* Bounty Hunter and Slardar both have ultimates (Corrosive Haze and  Track) that reveal Invoker through Ghost Walk.
Witch Doctor
* Fragile supports with low armor are always a good prey, also her Psionic Trap will wear down most attempts to flee with their built-in disables: Silencer, Crystal Maiden, Warlock,  Ancient Apparition, Grimstroke, Witch Doctor
Slardar
* Heroes who can provide True Sight are always credible threats: Slardar, Bounty Hunter, especially Zeus since his  Lightning Bolt provides True Sight without the need to detect her beforehand to apply the debuff. So even a late-coming Zeus can easily scout a large area to reveal her, and she cannot purge herself from his sight with the dispel talent.
Witch Doctor
* Multiple attackers thanks to summoned units or clones:  Meepo, Witch Doctor, Lycan, Enigma, Shadow Shaman
* Heroes that can quickly deal damage to her, regardless of how weak they are, can easily break through her Refraction:
* Multiple attackers thanks to summoned units or clones: Meepo, Witch Doctor, Lycan, Enigma, Shadow Shaman
* Multiple attackers thanks to illusions: Phantom Lancer,  Chaos Knight, Naga Siren (bonus for her
  Ensnare). Also despite the visual effects, Templar Assassin does not spill damage against illusions or buildings, so she is not a really good hero to clean up illusions.
* Weak damage but high tick rate or persist in a long time: Slark,  Gyrocopter, Queen of Pain, Shadow Shaman (Shackles), Jakiro, Pugna,
  Doom
Doom
Witch Doctor
* Heroes with channeling abilities: Enigma, Witch Doctor, Crystal Maiden.
Slardar
* Heroes with high physical damage can damage Lifestealer more than he can heal:  Bristleback,
  Clinkz, Luna,Shadow Fiend, Slardar, Terrorblade
Slardar
* Slardar's Slithereen Crush allows him to stun Spectre and illusions, and Corrosive Haze prevents her from juking with  Spectral Dagger.
Witch Doctor
* Death Ward's first target (before it bounces) can evade it, therefore  Windranger and
  Phantom Assassin are poor choices to use it on.
Slardar
* While Slardar has Guardian's Sprint activated,  Powershot cannot slow him and is easier to avoid.
* Slithereen Crush and Bash of the Deep help Slardar put Windranger in place, even when she uses  Windrun to escape.
* Corrosive Haze from Slardar is very effective against Windranger's already low armor. This becomes even worse if she has Aghanim's Scepter-upgraded Windrun, because it also reveals her position and allowing his allies to use their abilities on Windranger.
* Note that the invisibility provided by Aghanim's Scepter-upgraded Windrun is not broken upon attacking, casting abilities or using items, so it's vital to cast Corrosive Haze beforehand.
Witch Doctor
* Heroes with channeled abilities which Assassinate may cancel at long range: Witch Doctor, Crystal Maiden, Shadow Shaman, Pugna
Slardar
* Slardar can use Guardian Sprint with Blink Dagger or Shadow Blade to get close, and Slithereen Crush will stun Sniper and slow him, making him vulnerable to Slardar's teammates.
* Corrosive Haze lowers Sniper's armor and makes Sniper's Shadow Blade useless, easily killing him with a few attacks.
Slardar
*  Bloodseeker's
  Rupture forces Slardar to stay still during fights, preventing Slardar from using Guardian sprint to move in and out of fights. This takes away the ability to initiate and re-initiate with Slithereen Crush's low cooldown. Due to the increased move speed from Guardian Sprint, Slardar can lose health at about 160% the rate of normal heroes while under Rupture. Bloodseeker's
  Thirst also gives him enough move speed so that he's one of the few heroes who can outrun or catch up to a Slardar during Guardian Sprint.
Witch Doctor
* Voodoo Restoration heals to counter Bloodseeker's Thirst.
* Rupture is generally useless against Witch Doctor while he is staying on Death Ward.
* Although Witch Doctor needs to be careful as  Blood Rite can interrupt Death Ward.
Witch Doctor
* Heroes that have a channeled ability that can be interrupted by Meat Hook: Shadow Shaman, Witch Doctor, Enigma, Bane.
Additional:
*  Meat Hook interrupts Death Ward from a decent range, even through Black King Bar & Glimmer Cape.
* Pudge can survive the damage from Maledict because of his  Flesh Heap stacks.
* However the damage-over-time from  Rot is counteracted by Voodoo Restoration.
Slardar
* Corrosive Haze reveals Pudge's location, making it hard for him to use Meat Hook from the fog of war on Slardar's teammates or Slardar himself.
* Slithereen Crush interrupts Pudge while he is using Dismember.
* Guardian Sprint allows Slardar to avoid Meat Hook.
Additional:
* While Slardar has Guardian Sprint activated, Rot cannot slow him and Meat Hook is easier to avoid.
* Slithereen Crush allows Slardar to interrupt Dismember at close range (when Slardar is not a target).
* Corrosive Haze reveals Pudge's location, making it very difficult for him to land hooks from the fog.
Witch Doctor
* Low mobility heroes: Heroes with no/little means of traveling fast have difficulty getting to/away from Bounty Hunter due to his slowing Jinada and hastening Track. Few examples of such heroes are: Crystal Maiden,  Sniper,
  Ursa, Witch Doctor, etc.
Slardar
* Corrosive Haze provides True Sight on its target, exposing Bounty Hunter's position regardless of Shadow Walk.
* Guardian Sprint gives a very high movement speed bonus, allowing him to chase Bounty Hunter even if Slardar is tracked.
Additional:
* Bounty Hunter's  Shadow Walk is rendered useless with Corrosive Haze and makes Bounty Hunter an easy target for Slardar and his team.
Witch Doctor
* Paralyzing Cask's short stun rarely prevents Monkey King from ambushing Witch Doctor.
* Death Ward's long channel is easily interrupted by Boundless Strike.
Witch Doctor
* Another hero that should not leave a special circle for his ultimate. The only thing to be afraid is  Boundless Strike.
Slardar
* Illusion heroes like the aforementioned Phantom Lancer or Naga Siren, or heroes that tend to buy Manta Style, like Luna or Juggernaut, will give Slardar a hard time, as his damage is single-targeted.
Witch Doctor
* Heroes with long-lasting, undispellable debuffs will pinpoint the true Naga Siren: Spirit Breaker, Bloodseeker, Witch Doctor.
Witch Doctor
* Without Dust of Appearance or Sentry Wards, Riki is able to silence Witch Doctor with  Smoke Screen, and is likely to build a Diffusal Blade, leaving Witch Doctor without mana to cast Voodoo Restoration, as well as Skull Basher to interrupt Death Ward.
Slardar
* Corrosive Haze works much like Track, giving the enemy team vision over Riki. While it doesn't give a movement speed or gold bonus, it instead can melt Riki's armor and Slardar can use Guardian Sprint to catch up to him.
* Slardar's Aghanim's Shard, causes Slithereen Crush to apply Corrosive Haze even if Slardar does not have vision over him.
Additional:
* Corrosive Haze makes Riki completely vulnerable to Slardar and his allies, as Riki has no easy way of dispelling it.
* Slardar's physical damage with Slithereen Crush and Bash of the Deep amplified by Corrosive Haze can easily kill Riki.
Slardar
* Medusa cares less than other heroes about armor reduction, since  Mana Shield blocks 70% of all damage without taking armor/magic resistance into consideration. This makes 60% of your Corrosive Haze ineffective until Medusa's mana is drained.
Slardar
* Other heroes who has armor and slow debuffs won't allow Medusa to disengage from combat: Tidehunter, Bristleback, Slardar.
Witch Doctor
* Heroes with plenty of summons, such as Broodmother or Nature's Prophet can have their minions soak up most of your Paralyzing Cask.
Slardar
* Heroes who can provide True Sight or semi-reveal enemy heroes as Nature's Prophet is prone to buying Shadow Blade: Bounty Hunter, Slardar,  Spectre, Zeus, Spirit Breaker.
Witch Doctor
* Stone Form can easily interrupt heroes with long channeling spells, like Crystal Maiden, Bane, Witch Doctor, or Enigma.
Slardar
* Heroes with armor reducing abilities greatly hinder Visage's defense like Slardar and Dazzle.
Slardar
* Fortune's End applies a basic dispel which can be used to dispel Corrosive Haze, or even Slardar's own Guardian Sprint.
 False Promise is able to dispel Corrosive Haze and Slithereen Crush stun/slow from any allies Oracle chooses to cast it on.
 Fate's Edict can also be cast on Slardar to prevent him from proccing his Bash of the Deep.
*
*
Witch Doctor
* It is especially easy for Oracle to negate the damage from Maledict, and even heal through it with Fate's Edict and
  Purifying Flames.
 False Promise.
* If by some miracle an enemy is still about to die because of Maledict, he can still save him with